
Bingo Card Tutorial
So, Linda was asking about filling in the bingo card with images, so I thought I would do a little tutorial of how PicMonkey works. This is my favorite photo editing site because there is so much fun stuff available to play with - pretty much all of my images come off of PicMonkey.
PicMonkey has a free version and a premium version. I have the premium version, but the free version will work fine for this.
So, to begin - I download the bingo card to a folder on my computer. I reuse the image and when I'm done modifying it, I resave it under the same name so I'm always using the most current (i.e., filled in) version.
When you open PicMonkey, this is what it looks like:

You want the edit function, not the design or the collage. Although the collage function is awesome for making book cover collages and the actual bingo card itself, soI use it a lot!
When you click on edit, it opens up some options to choose an image, including computer. Browse and find your bingo card on your computer and upload it.
It will look more or less like this:

You find the overlays under either the butterfly or the apple. The apple has the themes, which is what is showing over on the left hand side. There are tons of available themes, including 6 Halloween-style themes and at least 3 Christmas-style themes. That is where you will find your cute overlays for your bingo markers.
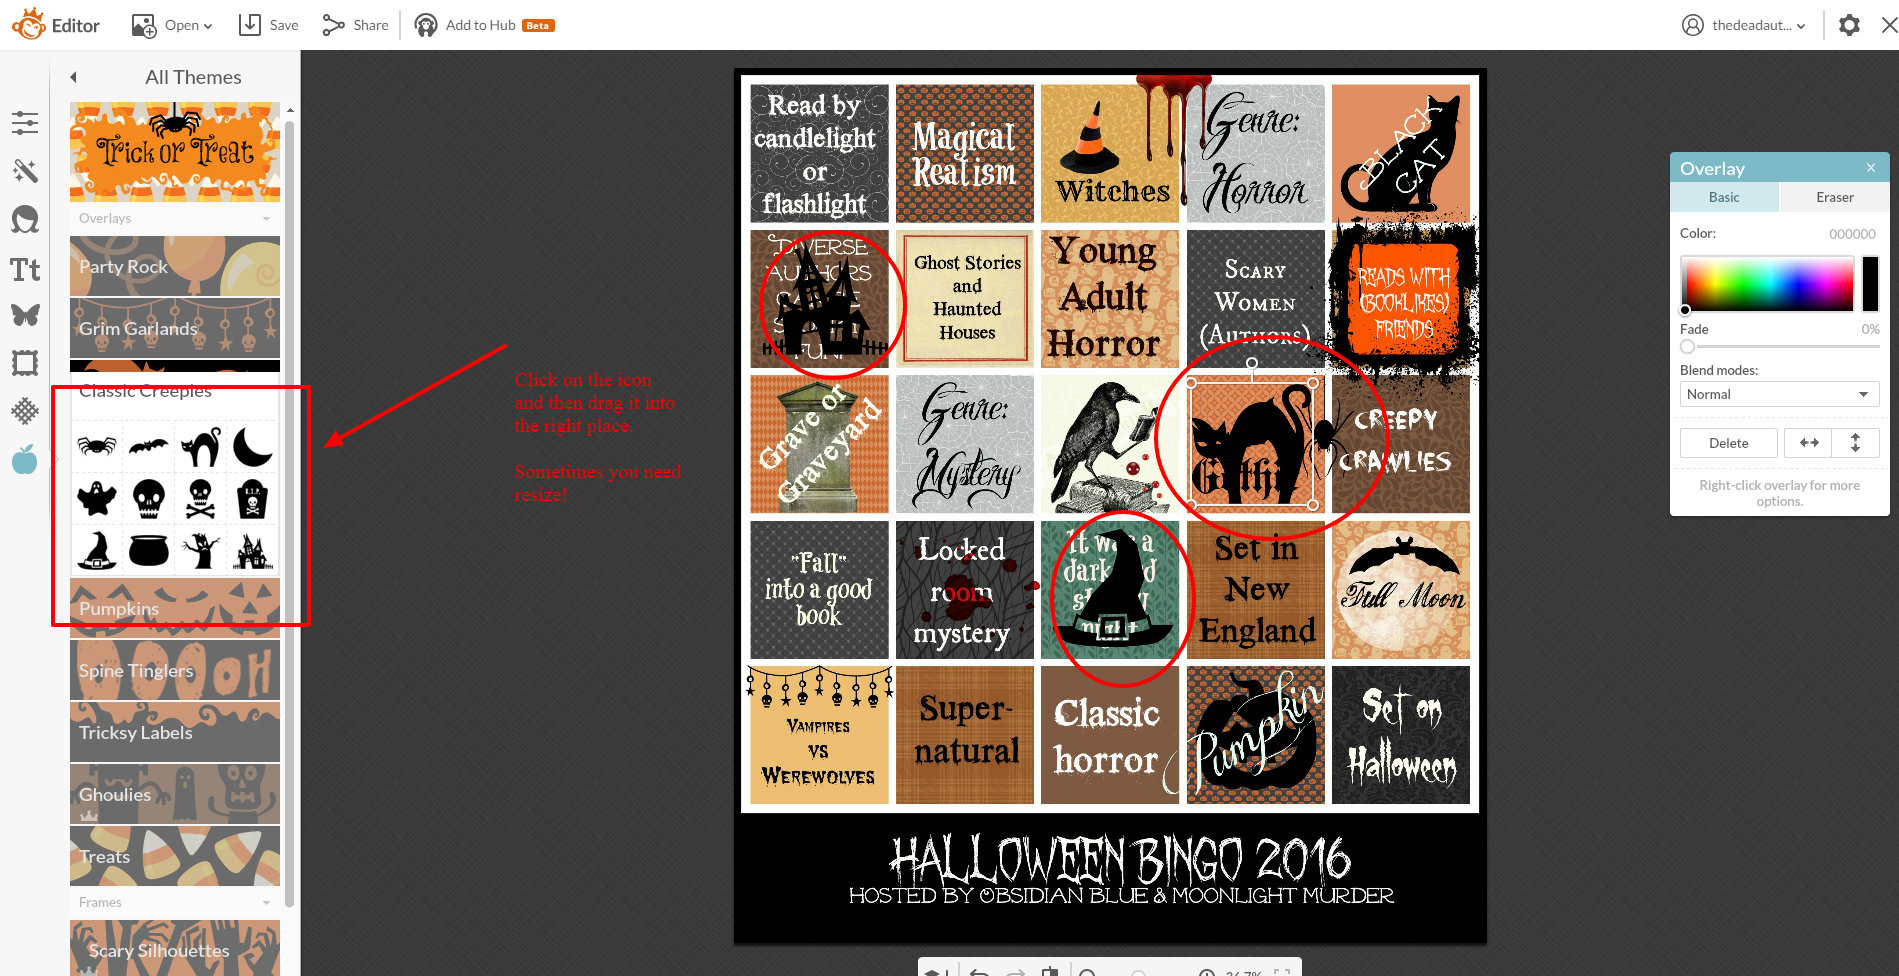
These are under the Trick or Treat theme. You click on them, and then drag them into place. Super simple! Sometimes they need to be resized, which is easy to do!
Anyway, I hope that helps! Have fun!
 4
4


 - Jim Butcher")


